Showing posts with label Frugality. Show all posts
Wednesday, May 1, 2013
Car Seat Strap Cover Hack
Do you ever happen upon an idea so simple and obvious that paradoxically it makes you feel like a genius? That's what this idea was for me. Neither of our car seats came with strap covers. I knew Target sold some monkey ones for $10, but I kept forgetting to buy them when I was at the store. When we went to Pennsylvania for Easter, I noticed the car seat straps left red marks on Will's neck on the long drive. Not wanting him to get more hurt, I was determined to finally get the strap covers before we drove back home.
I searched the Walmart near our hotel for car seat strap covers, but they didn't sell them. In a moment of inspiration, I bought a shoulder belt cover from the automotive section for 99 cents. I borrowed a pair of scissors from my husband's and cut it in half. It is the perfect size for the car seat straps and I saved $9 and it matches my car interior and car seat better than actual car seat strap covers. That's what you call a win win win.
It works for me.
Thursday, April 11, 2013
Free Luxuries
1) Take a bath. If you don't have a bathtub, take an extra long shower instead.
2) Eat more slowly. Savor each bite.
3) Reread your favorite book.
4) Go for a walk and make an effort to notice the beauty around you.
5) Take a nap.
Monday, April 8, 2013
I Scream, You Scream
We all scream for free ice cream! This is just a public service announcement that tomorrow is free cone day at all Ben and Jerry's scoop shops. I've participated in this event in the past, and there's no catch. Go get some.
(Not a sponsored post.)
Wednesday, April 3, 2013
Montessori Inspired Toy
Like most children, my baby isn't particularly interested in toys. He is much more interested in whatever I'm holding--my phone, my computer, a tissue, etc. Because I don't want these things in his mouth, I often have to say no. However, when it comes to keys, I say yes. They're metal so he can't damage them and they can easily be cleaned.
I know they make plastic keys for babies, but I thought it would be better to get him a set of "real" keys because I knew it would be more appealing to my son to have something adult, they could be recycled when my baby outgrew them, and probably wouldn't be any more expensive.
We headed down to the local hardware store and I asked how much blank keys cost. The clever man working behind the counter asked if I wanted them for my baby and when I answered in the affirmative, he offered me a paper bag with half a dozen keys for free. They were miscuts that had been lying around. Because I was so pleased with the service and because I wanted to support this particular local business, I decided to buy a couple of key covers too; the different colors and textures makes for a more interesting toy too, I think.
All I had to do was assemble it all on a key ring and my baby had a new toy for pennies. We've had the keys for a couple of months now and they're still one of his favorite toys. A virtually free practical life toy works for me.
Thursday, December 20, 2012
The National Christmas Tree
I really don't understand how Christmas has snuck up on me this year. Thanksgiving was so early, it seems like I should have had all the time in the world to get ready for it. I think it probably has something to do with Chuk's crazy end of semester school schedule and a teething baby and each of us getting sick. Things have finally settled into a more normal pace and I'm determined to squeeze as much holiday spirit and quality family time into the remaining days of 2012 as I can.
Now that we've grown to a family of three, it's really important to me that we begin to establish some family traditions. I want our holidays (all holidays, not just the December ones) to be based on creating memories together rather than material acquisition. We've only bought the baby three presents for Christmas; they were $1 each and came from the Target dollar spot.* I'm making him some things too, but I'm trying to be realistic in recognizing that he really doesn't need anything, can't appreciate things yet, and has limited storage space in his room.
Instead of gifts, we have lots of activities planned from looking at Christmas lights in our neighborhood to baking to singing carols. One night, after work this week, we were able to check another fun activity off our list. We went to see the new National Christmas tree (the old one fell down this summer in the durecho) and all the small state and territory trees. We also posed for another free picture with Santa. (Baby was happier than he looks in this picture, but the shutter got snapped between smiles.)
It was so nice to be out doing festive things with my guys. The evening left me feeling quite merry and bright.
*For the curious, we got him a wood and metal tambourine, a metal slinky, and a small sensory ball that is similar to these.
Now that we've grown to a family of three, it's really important to me that we begin to establish some family traditions. I want our holidays (all holidays, not just the December ones) to be based on creating memories together rather than material acquisition. We've only bought the baby three presents for Christmas; they were $1 each and came from the Target dollar spot.* I'm making him some things too, but I'm trying to be realistic in recognizing that he really doesn't need anything, can't appreciate things yet, and has limited storage space in his room.
Instead of gifts, we have lots of activities planned from looking at Christmas lights in our neighborhood to baking to singing carols. One night, after work this week, we were able to check another fun activity off our list. We went to see the new National Christmas tree (the old one fell down this summer in the durecho) and all the small state and territory trees. We also posed for another free picture with Santa. (Baby was happier than he looks in this picture, but the shutter got snapped between smiles.)
It was so nice to be out doing festive things with my guys. The evening left me feeling quite merry and bright.
*For the curious, we got him a wood and metal tambourine, a metal slinky, and a small sensory ball that is similar to these.
Monday, December 10, 2012
Meaningful, Affordable Gift Idea (With Tutorial)
I'm sometimes wary of DIY gifts because too often I find that the cost of supplies exceeds the cost of a comparable store bought gift and with the former you're having to invest your time too, which can be in short supply at this time of year. In contrast, I promise this handmade ornament is both inexpensive and easy (if your hand model is in a cooperative mood.)
I bought a tub of clay from Target (in the office/art supplies section) for something like $5.00, give or take. For a baby hand print, you need to grab a hunk of clay about the size of your two hands balled together, slightly larger than a baseball. With all rings off, work the clay in your hands for a few minutes to make sure there aren't any air bubbles in the clay, and then roll into a ball like it's a meatball. While you're rolling, the goal is to make sure there are no seams in the ball.
Put the ball on a piece of plastic wrap and cover with a second piece of plastic wrap. Here's a thrifty tip: Pre-used plastic wrap (clean, of course) actually works better than a new piece of plastic wrap because it's less clingy, and it also seems to be less likely to wrinkle during the next step.
With the clay between the plastic, slowly roll the ball into a flat disk with a rolling pin. More passes with less pressure makes the plastic less likely to wrinkle and leave undesired imprints in the clay. When your clay is about 1/4 inch thick, pull the top piece of plastic off the perfectly smooth, flat disk.Grab your hand model and put his hand on the disk. Use one hand to hold his hand in place (probably unnecessary if the hand model can be relied on not to wiggle) and your other hand to press the top of each part of his hand, to get an even imprint. Remember to place his hand towards the bottom of the disk so you have room to make a hole. My instinct was to try and center my model's hand, but that doesn't work for the next step.
Use a drinking straw to make a hole at the top of the ornament for hanging. Let dry for several days. Mine took about 3-4 days to dry completely. If desired, you could write the name of the hand model and the date on the back with a permanent marker.
A 2.5 pound container of clay will make at least six baby hand prints, so this gift costs about $1 each, yet it's thoughtful and personal. I also like that it's not messy (the clay isn't sticky) and doesn't take a lot of time if you do it assembly line style (i.e., roll all the balls, then flatten them all into disks, then do the hand impressions, then wipe your model's hand, then punch the holes.) You could also not punch the hole and give it with a plate stand if you think your recipient would prefer to display the hand print year round rather than have an ornament.
These are ideal gifts for parents and grandparents. We already gave one to my notoriously hard to shop for father-in-law and he liked it very much. We're keeping two for ourselves (one of each hand) and when Baby is grown up and moves out (*sob*) we'll give him one to take with him.
Sunday, November 4, 2012
Birthday Freebies
One of the nice things about birthdays is getting free food from restaurants. Many of the offers are good for a week or two after your actual birthday, so you have an opportunity to take advantage of several. Here are some that I'm signed up for or have heard about:
California Tortilla will give a free burrito if you're a member of their Burrito Elito program. Good for two weeks after your birthday. (This is my favorite chain Mexican restaurant. The offer lots of other promotions throughout the year as well and only send an email once a month. You can get a free taco on Tuesday if you say "vote" to the cashier.)
IHOP will give you a free Rooty Tooty Fresh and Fruity, or meal of equal or lesser value, within a week of your birthday. You have to print an email and bring it in to redeem the offer. They'll also give you one free meal for your anniversary, but just one, so your spouse will have to pay or you'll have to go by yourself.
Noodles and Company will give you a free noodle bowl within a week of your birthday. I forget the exact dollar amount of the offer but it's like $8. You have to print and bring in an email to redeem the offer.
Cold Stone Creamery offers a buy one get one free coupon for your birthday. Again you have to print an email and bring it in to redeem.
According to their website, Denny's offers a free Grand Slam on your birthday. My friend told me about this offer so I'm not sure if you have to be signed up for their email to get it.
Do you know of any other birthday deals or freebies?
Wednesday, October 17, 2012
Hooded Baby Towel Hack
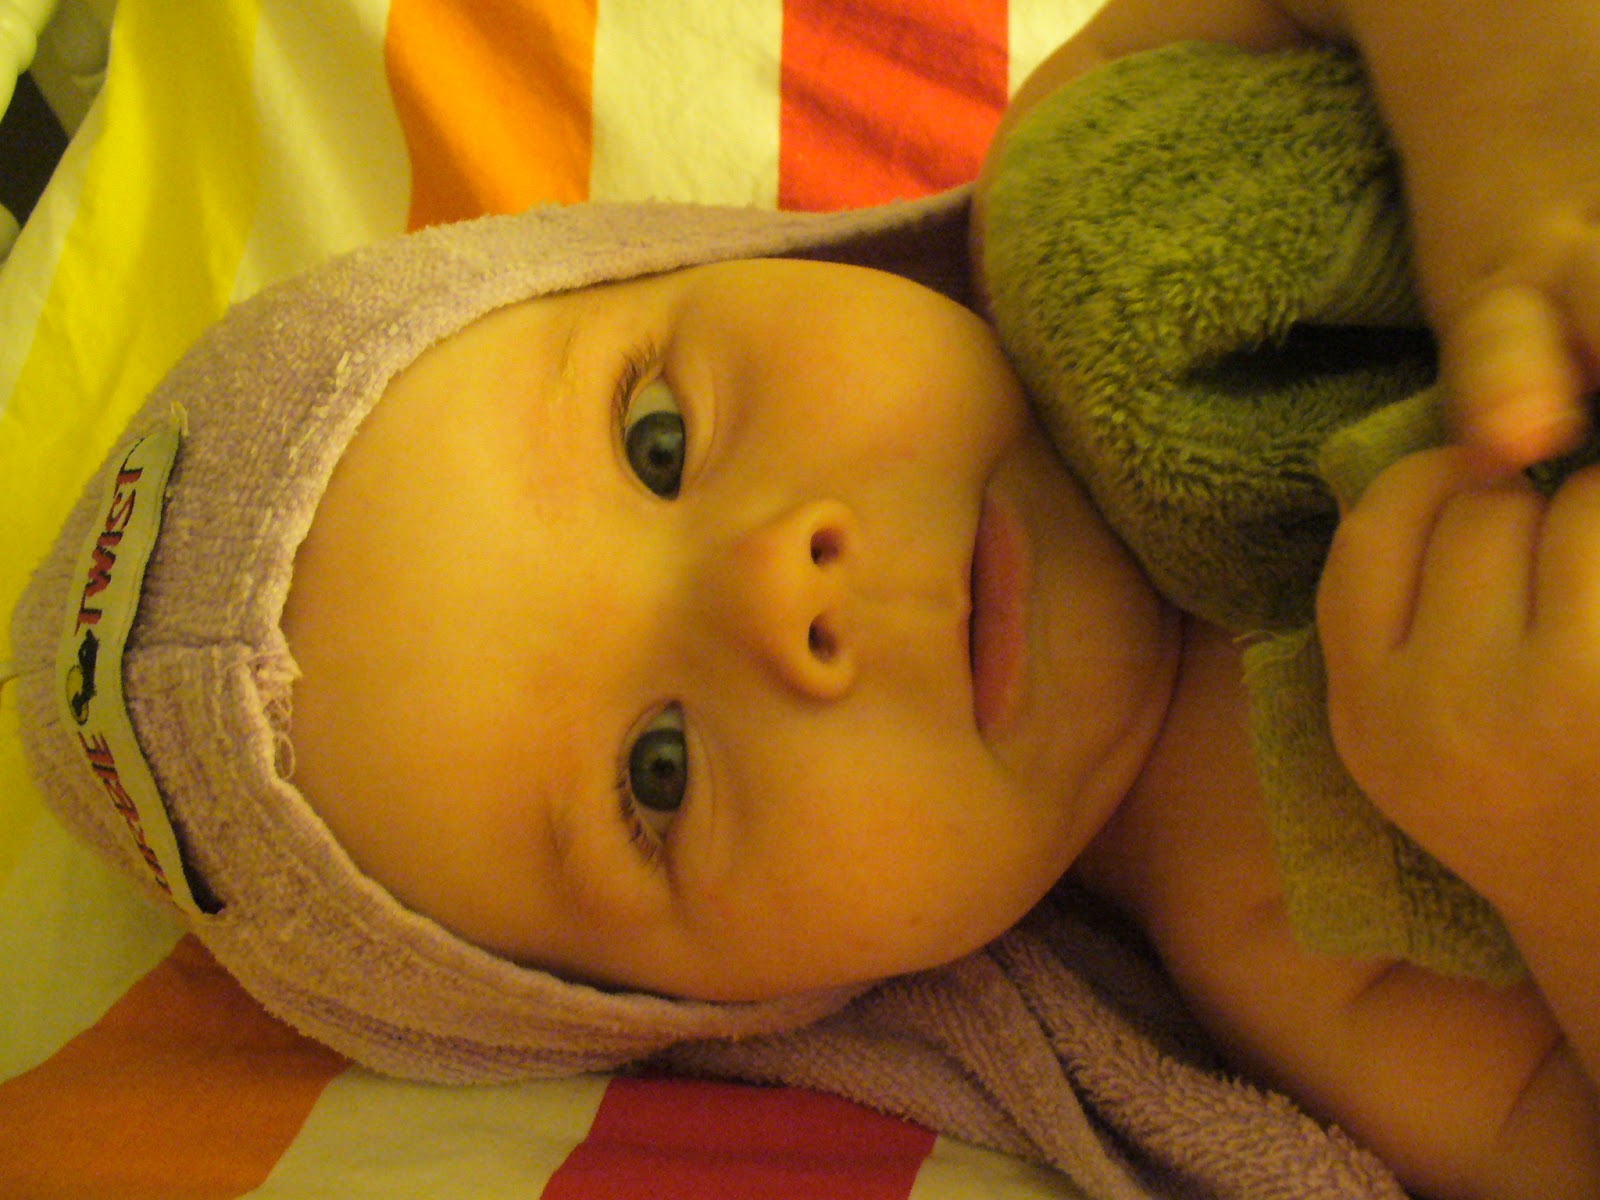
I think hooded bath towels for babies are super cute, but they're expensive and can be too big for a wet, squirmy little body. Ages ago, someone had given me a microfiber hair towel as a stocking stuffer and it was sitting in the back of our linen closet. I never once used it for my hair but it works extremely well as a baby towel.
It's easy to cover the top of the baby's head quickly with the towel and it is the perfect length for a baby's body. (When we first started using it to dry him off, it reached almost to his feet and now it only covers a bit past his bottom. At both lengths it's long enough, without being too long.) Because it's microfiber, it dries him very quickly, which helps to keep him from getting too cold. We often use a hand towel to dry off the front of his body.
Turbie Towel or Turbie Twist are the brand name of the product to which I'm referring, and they sell for like $5, but I've seen generic versions at the dollar store as well for just a buck. Either way, they are much less expensive than actual hooded baby bath towels and I'd say slightly more effective since the baby doesn't get all tangled up in it.
Using a hair towel as a baby towel works for me.
It's easy to cover the top of the baby's head quickly with the towel and it is the perfect length for a baby's body. (When we first started using it to dry him off, it reached almost to his feet and now it only covers a bit past his bottom. At both lengths it's long enough, without being too long.) Because it's microfiber, it dries him very quickly, which helps to keep him from getting too cold. We often use a hand towel to dry off the front of his body.
Turbie Towel or Turbie Twist are the brand name of the product to which I'm referring, and they sell for like $5, but I've seen generic versions at the dollar store as well for just a buck. Either way, they are much less expensive than actual hooded baby bath towels and I'd say slightly more effective since the baby doesn't get all tangled up in it.
Using a hair towel as a baby towel works for me.
Thursday, September 20, 2012
Making a Hair Cutting Cape
I have three loads of laundry sitting in my living room waiting to be put away and I can't remember the last time my floors were vacuumed, but I made the executive decision to continue to ignore these problems and instead make a smock/cape thing-y for our at home hair cuts, priorities be damned.
When we first began at-home haircuts, we tried using a towel to drape around the neck and shoulders of the person receiving the haircut, but after washing we learned that this left tiny hairs in all the other clothes and towels and made them very itchy, so we stopped doing that right away. Then, being the classy people we are, we cut a plastic garbage bag open and used that to drape around us when we were getting our hair cut. It kept the hair off our clothes, but was very hot. Nevertheless, we've used he garbage bag method until now.
Over Labor Day weekend, we went to Ikea, where I spied laminated cotton fabric on sale for $1.99 a yard. I bought a yard and let it sit, folded on my coffee table until this very week when I needed something to do that was easy, yet satisfying while I continued to ignore the messes.
To make the hair cutting cape, I cut a line about 5.5 inches long down the center fold of the fabric. Then, keeping the fabric folded, I cut a semi-circle 7.25 inches in diameter at the bottom of the slit. A small bowl would make an excellent template for the semi circle. Unfold and slip the circle around your neck. Boom, you're ready for a haircut.
I've been thinking about sewing some strips of velcro to either side of the slit, so that it attaches more like a professional cape, but I'll probably just leave it as-is. When testing it out, the fabric was heavy enough to stay where it was draped, so the velcro is kind of unnecessary. Plus, I really like that this is a no-sew project. (The laminated cotton doesn't fray, so no hemming is needed.) If we have problems with the cape not staying in place in the future, I could always add velcro then, or just use a binder clip to hold the ends in place behind the neck.
For $1.99 and two minutes work, this was an extremely satisfying project. I feel like I got something done, without having to actually do anything. Maybe I'll tackle the laundry and vacuuming tomorrow.
When we first began at-home haircuts, we tried using a towel to drape around the neck and shoulders of the person receiving the haircut, but after washing we learned that this left tiny hairs in all the other clothes and towels and made them very itchy, so we stopped doing that right away. Then, being the classy people we are, we cut a plastic garbage bag open and used that to drape around us when we were getting our hair cut. It kept the hair off our clothes, but was very hot. Nevertheless, we've used he garbage bag method until now.
Over Labor Day weekend, we went to Ikea, where I spied laminated cotton fabric on sale for $1.99 a yard. I bought a yard and let it sit, folded on my coffee table until this very week when I needed something to do that was easy, yet satisfying while I continued to ignore the messes.
To make the hair cutting cape, I cut a line about 5.5 inches long down the center fold of the fabric. Then, keeping the fabric folded, I cut a semi-circle 7.25 inches in diameter at the bottom of the slit. A small bowl would make an excellent template for the semi circle. Unfold and slip the circle around your neck. Boom, you're ready for a haircut.
I've been thinking about sewing some strips of velcro to either side of the slit, so that it attaches more like a professional cape, but I'll probably just leave it as-is. When testing it out, the fabric was heavy enough to stay where it was draped, so the velcro is kind of unnecessary. Plus, I really like that this is a no-sew project. (The laminated cotton doesn't fray, so no hemming is needed.) If we have problems with the cape not staying in place in the future, I could always add velcro then, or just use a binder clip to hold the ends in place behind the neck.
For $1.99 and two minutes work, this was an extremely satisfying project. I feel like I got something done, without having to actually do anything. Maybe I'll tackle the laundry and vacuuming tomorrow.
Saturday, September 8, 2012
Date Night: Sick Edition
Chuk and I decided we'd have a "date night" on Friday. Date night is in quotes because we stayed home and watched TV, thus it was very similar to what we do almost every night. However, we upped our game by renting a movie, buying a ton of candy and soda, and making popcorn. Never underestimate the power of popcorn.
We waited until the baby was asleep* to pop the DVD in and then gorged ourselves on junk food. It was nice to cuddle in the dark watching a movie. It felt like old times.
Even though we didn't go anywhere, it was just as well since Chuk has a head cold and can't go anywhere anyway. Besides, I'm guessing our date cost around $6, whereas if we had gone out to the movies and had snacks, it probably would have cost in the neighborhood of $40. I'm not 100% sure since I haven't been to the movies since February.
I do want to go to the movies though. I'd really like to see Celeste and Jesse Forever and Sleepwalk with Me. I can just go by myself though. Chuk isn't crazy about going to the movies, so he can stay with the baby. Win win. Have you seen any good movies lately?
*Wouldn't you know it? That little sneaky Pete baby woke up two minutes into the movie and wanted to eat. Alas, this is our life right now. I gave Pete a quicky feeding and we got right back to The Dictator. No harm, no foul, no babysitter.
Monday, August 13, 2012
Cheap Date Night: Newborn Edition
This weekend was the Perseid Meteor shower. I thought it would be a nice little opportunity for a date night with Chuk. The vision was that we'd get the baby dressed in his jammies, all of us would load into the car and drive out to a field somewhere and then the baby would sleep in the car while Chuk and I laid out and looked at shooting stars.
Reality was a little different. On Saturday night we did all load into the car and drive away from the city, but we wound up in the parking lot of Mount Vernon, George Washington's home. The baby woke up and started crying when we turned off the car and the sky was completely cloudy and we couldn't see a single star, much less a shooting star. Major fail.
But we were determined. We headed out again on Sunday night. This time we ended up at a pullout on the side of the road near the Potomac River. (There were too many trees at the Mt. Vernon parking lot to go make it worth going back there again.) The baby stayed asleep so we pulled out our lawn chairs and our bag of trashy snacks and sat in front of the car looking up at the sky. (Sitting in lawn chairs on the side of the road in the middle of the night is exactly as classy as it sounds, but hey, you gotta do what you gotta do. We're city folk.)
Reality was a little different. On Saturday night we did all load into the car and drive away from the city, but we wound up in the parking lot of Mount Vernon, George Washington's home. The baby woke up and started crying when we turned off the car and the sky was completely cloudy and we couldn't see a single star, much less a shooting star. Major fail.
But we were determined. We headed out again on Sunday night. This time we ended up at a pullout on the side of the road near the Potomac River. (There were too many trees at the Mt. Vernon parking lot to go make it worth going back there again.) The baby stayed asleep so we pulled out our lawn chairs and our bag of trashy snacks and sat in front of the car looking up at the sky. (Sitting in lawn chairs on the side of the road in the middle of the night is exactly as classy as it sounds, but hey, you gotta do what you gotta do. We're city folk.)
Instead of overcast skies, it was only partially cloudy...we could see maybe six stars at any given time. We craned our necks up to the sky, shielded our eyes from the headlights of oncoming traffic, passed the bag of chips back and forth, and talked. We had the deep, philosophical conversations that are usually reserved for late nights when you're in college or drinking too many cheap beers at the youth hostel or around a campfire.
I saw one shooting star, but Chuk didn't see any. It didn't matter though. I think the takeaway is that we miss talking to each other about things that don't matter, because those are the things that draw us closer together, and that in order to make that happen, we need to leave the apartment and not be engaged with the baby. Right now, we don't have any childcare, but I'm okay with that. With a little creativity, we can still find a way to connect.
Saturday, April 28, 2012
Moses Basket Alternative
In keeping with our efforts to contain cost and clutter (unintentional alliteration), we haven't bought a bassinet or Moses basket for the baby. Instead, we plan to keep it in a regular basket for the first couple of months.
I've had this basket for years; it was given to me as part of a housewarming gift and held bath towels and melamine kitchenware, but I've seen similar baskets at Ikea and discount stores like TJ Maxx. What I like about this basket is that even though it's made of natural materials it's extremely strong, it's shallow, and it has handles.
To prepare the basket for baby, I simply folded up a towel to the dimensions of the basket and then inserted the towel in a pretty embroidered pillowcase. Remember, you don't want babies sleeping in anything too cushy because it can be a suffocation risk. The towel provides enough padding while still being a firm...and it's easily washable.
Because babies outgrow Moses baskets and bassinets so quickly, they can only use it until they learn to roll over, it just makes sense to re-purpose a regular basket for a few months for baby, and then re-integrate the basket back into home storage when you're done with it.
P.S. I totally don't think you need a Moses basket or bassinet, but because my husband really wants to co-sleep with the baby and there's some increased risk of SIDS with that, a basket seemed like a good way to keep the baby in bed with us without compromising safety or splurging on a co-sleeper.
I've had this basket for years; it was given to me as part of a housewarming gift and held bath towels and melamine kitchenware, but I've seen similar baskets at Ikea and discount stores like TJ Maxx. What I like about this basket is that even though it's made of natural materials it's extremely strong, it's shallow, and it has handles.
To prepare the basket for baby, I simply folded up a towel to the dimensions of the basket and then inserted the towel in a pretty embroidered pillowcase. Remember, you don't want babies sleeping in anything too cushy because it can be a suffocation risk. The towel provides enough padding while still being a firm...and it's easily washable.
Because babies outgrow Moses baskets and bassinets so quickly, they can only use it until they learn to roll over, it just makes sense to re-purpose a regular basket for a few months for baby, and then re-integrate the basket back into home storage when you're done with it.
P.S. I totally don't think you need a Moses basket or bassinet, but because my husband really wants to co-sleep with the baby and there's some increased risk of SIDS with that, a basket seemed like a good way to keep the baby in bed with us without compromising safety or splurging on a co-sleeper.
Wednesday, April 18, 2012
National Parks Week
With the beautiful weather we've been having, I'd love to head out to Shenandoah this weekend, but hopefully I'll be too busy having a baby, and if I'm not, Chuk will have to work. Go and let me live vicariously through you!
Fun fact: my father-in-law is crossing an item off his bucket list this summer by taking a 6-ish week national parks road trip. He's going to drive cross country only stopping at national parks. Fun, right? He's turning 60 next month and he's never been west of the Mississippi River before.
Monday, April 9, 2012
Sewing A Changing Pad Cover
I found it shocking to learn that changing pad covers cost more than the actual changing pad for a changing table. As usual, I decided to tackle the project myself to save a little money. I had no idea how to do it, but it wasn't too hard to figure out a "good enough" way.
I simply sewed a hem around the edges of the fabric, then laid the fabric upside down on the changing pad and pinned just the corners, taking up the excess fabric at the corners (like you would when wrapping a present.) Then I sewed a straight line down where I had pinned to form a corner and repeated for all four corners. I turned it right side out and slipped it over the changing pad for a semi-fitted cover. The professional covers have elastic around the bottom (like a fitted sheet) but I find it looks exactly the same if I just tuck the ends under the pad. I was able to make three covers for less than the cost of buying one.
Monday, March 26, 2012
Curtains in the Nursery
We're still plugging away at getting this baby's room ready for it. In a closet I had a pair of curtains from the room I rented when I moved to DC eight years ago. They're just cheap-y white cotton curtains from Ikea, but I have always liked the texture of them; they look and feel like linen.
They were an awkward length for the window, neither floor length nor cafe length. Though I generally prefer floor length curtains, I think shorter curtains are safer in a baby's room (so they can't be tugged on.) I sewed a big hem on the both panels and then added some ball fringe to the bottom to make them a little more fun. I love the way the ball fringe looks with the Jenny Lind crib we have.
I had the curtain rods and finials from that same Ikea shopping trip eight years ago. Chuk kindly hung them so I wouldn't have to stand on a chair with my big belly.
Other than the cost of four yards of ball fringe, which I think cost around $13 (and I still have some left over) the curtain project was free. It only took an afternoon and turned out better than I imagined it.
P.S. Try not to be too jealous that four out of the five windows in our apartment look out onto an alley with a cinder block wall adorned with peeling paint.
They were an awkward length for the window, neither floor length nor cafe length. Though I generally prefer floor length curtains, I think shorter curtains are safer in a baby's room (so they can't be tugged on.) I sewed a big hem on the both panels and then added some ball fringe to the bottom to make them a little more fun. I love the way the ball fringe looks with the Jenny Lind crib we have.
I had the curtain rods and finials from that same Ikea shopping trip eight years ago. Chuk kindly hung them so I wouldn't have to stand on a chair with my big belly.
Other than the cost of four yards of ball fringe, which I think cost around $13 (and I still have some left over) the curtain project was free. It only took an afternoon and turned out better than I imagined it.
P.S. Try not to be too jealous that four out of the five windows in our apartment look out onto an alley with a cinder block wall adorned with peeling paint.
Tuesday, March 20, 2012
Lighting the Nursery
Apparently, the nesting instinct skipped our house. So when it finally dawned on us "This baby is coming soon" we decided we needed to kick it into high gear and get our former office/guest room ready to become a nursery. We had sort of been working on it for months, but our efforts were more along the lines of brainstorming ideas and decluttering and rehoming nearly everything that had been in that room. It was a big job in and of itself, but it has left little time for the fun, "prettifying" part of it.
While "prettification" is all well and good, we're still working with a budget which is best described as "the closer to zero the better". I had the lamp pictured above for at least seven years. No joke, I have a thing for acrylic furniture and accessories and it matched my feminine, single girl bedroom back in the day. It does not match our gender-neutral nursery though.
With no overhead lighting in that room and no desire to buy a new lamp when I already had a functional one, a lamp makeover was in order.
Two quick coats of silver spray paint and a new lampshade later, it looks like a new lamp. We already had the lamp and spray paint, so I'm counting those costs as $0. The lampshade was $7.99. Less than $10 for a "new" lamp, nice.
Linking to 320 Sycamore.
While "prettification" is all well and good, we're still working with a budget which is best described as "the closer to zero the better". I had the lamp pictured above for at least seven years. No joke, I have a thing for acrylic furniture and accessories and it matched my feminine, single girl bedroom back in the day. It does not match our gender-neutral nursery though.
With no overhead lighting in that room and no desire to buy a new lamp when I already had a functional one, a lamp makeover was in order.
Two quick coats of silver spray paint and a new lampshade later, it looks like a new lamp. We already had the lamp and spray paint, so I'm counting those costs as $0. The lampshade was $7.99. Less than $10 for a "new" lamp, nice.
Linking to 320 Sycamore.
Thursday, February 23, 2012
Mending Sheets
Out of nowhere, my favorite sheets developed three holes. (Perhaps it's all my nighttime tossing and turning?) I have a bit of a sheet fetish, so there was no way I was going to throw out my favorites. Also, sheets are expensive. I've done other basic mending before and this was pretty much the same process.
At first I tried just sewing (using a whip stitch? I'm not great with stitch names) the two sides of the tear together, but the fabric was too worn, so I cut out my stitches and used some iron on hem tape to reinforce the back of the tears with another little scrap of fabric. Then I re-sewed the two of the holes with the "whip stitch".
I didn't really love how it turned out because the fabric was a little puckered and it looked like the stitches could pull out.
With the final tear, I reinforced the back of the sheet with scrap fabric and the hem tape, but then used a satin stitch to cover the tear. I was much happier with how this turned out. It didn't create any wrinkles in the fabric and it seems like a much stronger repair.
At first I tried just sewing (using a whip stitch? I'm not great with stitch names) the two sides of the tear together, but the fabric was too worn, so I cut out my stitches and used some iron on hem tape to reinforce the back of the tears with another little scrap of fabric. Then I re-sewed the two of the holes with the "whip stitch".
I didn't really love how it turned out because the fabric was a little puckered and it looked like the stitches could pull out.
With the final tear, I reinforced the back of the sheet with scrap fabric and the hem tape, but then used a satin stitch to cover the tear. I was much happier with how this turned out. It didn't create any wrinkles in the fabric and it seems like a much stronger repair.
Monday, January 30, 2012
Tons of Tiny Clothes
Let's get real. Shopping for baby clothes is probably one of the top ten pleasures in life. (Look how cute. They're so small!) But as fun as shopping for tiny clothes is, the thought of buying 5 wardrobes (newborn, 0-3, 3-6, 6-9, and 9-12 months) for the first year alone makes me kind of want to throw up because baby clothes can be so expensive and we're a single income family.
Chuk and I had gone thrift store shopping in our area a few times for baby clothes, but we live in such an expensive area that even thrift stores aren't very thrifty. However, over the weekend we drove a few hours south to spend some time with Chuk's family and while we were there we did some more thrift store shopping for baby. (Cheaper real estate = cheaper thrift store prices) We were able to get 27 articles of baby clothes for $31 in sizes ranging from newborn to 0-3 months to 3-6 months. We were both pleased.
We probably still don't have enough clothes in these small sizes, but it turns out we are having a baby shower, so I think other people will probably be getting us some baby clothes too. (See above about how fun shopping for baby clothes is.) I'm certainly less worried about it now than I was before.
Now, to figure out how to organize all the tiny clothes.
Monday, January 23, 2012
Maternity Clothes on the Cheap
I'm in my third trimester of pregnancy and I've spent less than $100 on maternity clothes. I've had a hard time finding national averages for how much women spend on maternity clothes, but I've seen estimates ranging from $400 on a bargain website to $1200 on MSN money. One of my favorite frugal bloggers, Penny Saver, who is a never-ending source of inspiration for me, spent almost twice as much as I did on her maternity wardrobe, so I think I'm doing pretty well.
The first thing I did was evaluate my existing wardrobe to see what would still fit my growing belly. I was surprised how much still works for me. I had two empire waisted tops, two turtlenecks, a long sleeved tee, two polo shirts, two sweaters, and five dresses that fit me. Serendipitously, I prefer shift and wrap dresses; both styles work well as maternity dresses. I also had one sweater dress and the knit simply stretches over my bump. Cardigans, scarves, jewelry and other accessories should not be overlooked either as all of these pieces will fit you throughout pregnancy. (Simply don't button the cardigan.)
I think one of the reasons I was successful at finding so many pieces in my own closet that work for me is that I was very careful in how I thought about things. I spent a lot of time going through everything and trying things on. Have you heard that saying that you wear 20% of your clothes 80% of the time? Your potential maternity clothes are probably in the 80% of clothes you don't wear very often/have forgotten about. Seriously, take an afternoon and try a bunch of stuff on.
Though I already had a lot of stuff I could wear during my pregnancy, I had to buy a few things to fill in the gaps. I bought:
1) a maternity band, which helped me wear my regular jeans into the second trimester. This is the one I have. I don't know if it is better or worse than other types, I bought it because it was cheaper than others I saw.
2) maternity jeans. All of my pre-pregnancy pants are mid-rise, which are not very forgiving with a swelling abdomen. If you typically wear low rise pants, you may be able to get away with not buying maternity pants. I bought these maternity jeans when they were on sale. I had to get them hemmed (at my dry cleaner's) which added to the cost, but even with the cost of hemming they were WAY cheaper than any jeans I saw at specialty maternity stores.
3) two pairs of leggings. (In retrospect, I wish I had only bought one pair. I haven't needed two.) I knew I had a lot of dresses already in my wardrobe, so my plan was to pair them with leggings to get me through the winter. I bought these online from JC Penney when I bought the jeans.
4) a pair of pajama pants. (In retrospect, I wish I had bought two pair because I live in these.) I bought these from Old Navy. They are regular (non-maternity) PJ pants. I bought them two sizes bigger than my normal size and they are glorious. Hands down, my favorite outfit is one of my husband's undershirts and these oversized PJ pants. It is a personal tragedy for me that I can't wear it out of the house. I wear it to bed and for lounging, too.
5) extra undies. Some women, including me, develop a problem during pregnancy where it feels like your crotch is bruised. It's simply a result of increased blood flow to the region, the baby putting pressure down there, and your body loosening up. I heard going commando or wearing bigger panties can help. I bought new panties two sizes larger than what I usually wear. They are the granniest of granny panties, and you know what, I don't care one bit. They're comfy.
6) a caftan. I was given a caftan from this etsy store for Christmas. (I'm not counting its cost in my total since it was a gift.) It is incredibly comfy and though I just use it for lounging, theoretically I could wear it out too. I'm thinking about wearing it as my post-delivery coming home outfit since I think it will be easy to nurse in. I am also thinking about buying another one for post-pregnancy.
The reason I listed my sources for things (none of the links are affiliate links) is because I want you to notice that I didn't buy anything from a maternity store. Maternity stores are a rip off. You're going to pay a ton of money for poor quality clothes. I'd rather spend that money on cute baby clothes or on decorating the baby's room.
In summary, to save money on maternity clothes I would suggest you try to reuse as much of what you already have as you can. You should consider buying regular, non-maternity clothes two sizes bigger than what you normally wear because simply being labeled "maternity" carries with it a premium price. If you do need specific maternity clothes, shop sales and clearance at department stores rather than specialty maternity stores.
Maternity clothes are not investment pieces for the rest of your life; you're only going to wear them for a few months, so you might as well save some money on them. Although my maternity wardrobe is small (it all fits in one dresser drawer) I have more than enough to last me the whole pregnancy, spanning three seasons, and I don't feel like I'm wearing the same thing everyday. And even though I am a housewife, I daresay that my maternity wardrobe would work just as well if I worked in an office.
The first thing I did was evaluate my existing wardrobe to see what would still fit my growing belly. I was surprised how much still works for me. I had two empire waisted tops, two turtlenecks, a long sleeved tee, two polo shirts, two sweaters, and five dresses that fit me. Serendipitously, I prefer shift and wrap dresses; both styles work well as maternity dresses. I also had one sweater dress and the knit simply stretches over my bump. Cardigans, scarves, jewelry and other accessories should not be overlooked either as all of these pieces will fit you throughout pregnancy. (Simply don't button the cardigan.)
I think one of the reasons I was successful at finding so many pieces in my own closet that work for me is that I was very careful in how I thought about things. I spent a lot of time going through everything and trying things on. Have you heard that saying that you wear 20% of your clothes 80% of the time? Your potential maternity clothes are probably in the 80% of clothes you don't wear very often/have forgotten about. Seriously, take an afternoon and try a bunch of stuff on.
Though I already had a lot of stuff I could wear during my pregnancy, I had to buy a few things to fill in the gaps. I bought:
1) a maternity band, which helped me wear my regular jeans into the second trimester. This is the one I have. I don't know if it is better or worse than other types, I bought it because it was cheaper than others I saw.
2) maternity jeans. All of my pre-pregnancy pants are mid-rise, which are not very forgiving with a swelling abdomen. If you typically wear low rise pants, you may be able to get away with not buying maternity pants. I bought these maternity jeans when they were on sale. I had to get them hemmed (at my dry cleaner's) which added to the cost, but even with the cost of hemming they were WAY cheaper than any jeans I saw at specialty maternity stores.
3) two pairs of leggings. (In retrospect, I wish I had only bought one pair. I haven't needed two.) I knew I had a lot of dresses already in my wardrobe, so my plan was to pair them with leggings to get me through the winter. I bought these online from JC Penney when I bought the jeans.
4) a pair of pajama pants. (In retrospect, I wish I had bought two pair because I live in these.) I bought these from Old Navy. They are regular (non-maternity) PJ pants. I bought them two sizes bigger than my normal size and they are glorious. Hands down, my favorite outfit is one of my husband's undershirts and these oversized PJ pants. It is a personal tragedy for me that I can't wear it out of the house. I wear it to bed and for lounging, too.
5) extra undies. Some women, including me, develop a problem during pregnancy where it feels like your crotch is bruised. It's simply a result of increased blood flow to the region, the baby putting pressure down there, and your body loosening up. I heard going commando or wearing bigger panties can help. I bought new panties two sizes larger than what I usually wear. They are the granniest of granny panties, and you know what, I don't care one bit. They're comfy.
6) a caftan. I was given a caftan from this etsy store for Christmas. (I'm not counting its cost in my total since it was a gift.) It is incredibly comfy and though I just use it for lounging, theoretically I could wear it out too. I'm thinking about wearing it as my post-delivery coming home outfit since I think it will be easy to nurse in. I am also thinking about buying another one for post-pregnancy.
The reason I listed my sources for things (none of the links are affiliate links) is because I want you to notice that I didn't buy anything from a maternity store. Maternity stores are a rip off. You're going to pay a ton of money for poor quality clothes. I'd rather spend that money on cute baby clothes or on decorating the baby's room.
In summary, to save money on maternity clothes I would suggest you try to reuse as much of what you already have as you can. You should consider buying regular, non-maternity clothes two sizes bigger than what you normally wear because simply being labeled "maternity" carries with it a premium price. If you do need specific maternity clothes, shop sales and clearance at department stores rather than specialty maternity stores.
Maternity clothes are not investment pieces for the rest of your life; you're only going to wear them for a few months, so you might as well save some money on them. Although my maternity wardrobe is small (it all fits in one dresser drawer) I have more than enough to last me the whole pregnancy, spanning three seasons, and I don't feel like I'm wearing the same thing everyday. And even though I am a housewife, I daresay that my maternity wardrobe would work just as well if I worked in an office.
Tuesday, December 13, 2011
Preventing Food Spoilage
Having an extra cold fridge works for me.
Subscribe to:
Posts (Atom)