Wednesday, May 1, 2013
Car Seat Strap Cover Hack
Do you ever happen upon an idea so simple and obvious that paradoxically it makes you feel like a genius? That's what this idea was for me. Neither of our car seats came with strap covers. I knew Target sold some monkey ones for $10, but I kept forgetting to buy them when I was at the store. When we went to Pennsylvania for Easter, I noticed the car seat straps left red marks on Will's neck on the long drive. Not wanting him to get more hurt, I was determined to finally get the strap covers before we drove back home.
I searched the Walmart near our hotel for car seat strap covers, but they didn't sell them. In a moment of inspiration, I bought a shoulder belt cover from the automotive section for 99 cents. I borrowed a pair of scissors from my husband's and cut it in half. It is the perfect size for the car seat straps and I saved $9 and it matches my car interior and car seat better than actual car seat strap covers. That's what you call a win win win.
It works for me.
Thursday, April 4, 2013
Easter Dress Up
Wednesday, April 3, 2013
Montessori Inspired Toy
Like most children, my baby isn't particularly interested in toys. He is much more interested in whatever I'm holding--my phone, my computer, a tissue, etc. Because I don't want these things in his mouth, I often have to say no. However, when it comes to keys, I say yes. They're metal so he can't damage them and they can easily be cleaned.
I know they make plastic keys for babies, but I thought it would be better to get him a set of "real" keys because I knew it would be more appealing to my son to have something adult, they could be recycled when my baby outgrew them, and probably wouldn't be any more expensive.
We headed down to the local hardware store and I asked how much blank keys cost. The clever man working behind the counter asked if I wanted them for my baby and when I answered in the affirmative, he offered me a paper bag with half a dozen keys for free. They were miscuts that had been lying around. Because I was so pleased with the service and because I wanted to support this particular local business, I decided to buy a couple of key covers too; the different colors and textures makes for a more interesting toy too, I think.
All I had to do was assemble it all on a key ring and my baby had a new toy for pennies. We've had the keys for a couple of months now and they're still one of his favorite toys. A virtually free practical life toy works for me.
Wednesday, December 19, 2012
Meals for a Family with a New Baby
Since the mom was recovering from a Cesarean and they now have two kids under two (Remember when we met big sister?) we brought food, lots of food. For families with a new baby, I think it's more helpful to bring a whole day's worth of food rather than just dinner, if you can possibly manage it. The family's routine is off, they're sleep deprived, and I think it's sometimes harder to figure out what to eat for breakfast or lunch than what to eat for dinner. After all, you can always order a pizza for dinner, but you can't get breakfast delivered.
This particular family is kind of hard to make food for because the mom doesn't eat red meat, pork, or shellfish and toddlers are notoriously picky too. Plus, I think you have to be thoughtful about foods that might upset the baby's tummy if the mom is nursing. Broccoli, cabbage, onions, and excessive garlic can cause gas pain in newborns. Personally, I like to go easy on the dairy too, since many babies are lactose sensitive.
I did a lot of brainstorming to come up with a menu for them.
Breakfast: Cranberry scones (Joy of Cooking recipe, but I use craisins instead of currants)
Lunch: Veggie wraps (hummus, lettuce, cucumber, bell pepper, tomato, carrot)
Dinner: BBQ pulled chicken sandwiches, carrot slaw
Dessert/Snack: Chocolate chocolate chip muffins
I wish I had done a spinach and mushroom quiche instead of the scones for added protein and nutrition and I also wish I had time to add another side dish for dinner (I would have made green beans sauteed with almonds) but I have a baby too and can't do everything. I have to keep telling myself, something is better than nothing.
If you're looking for meal ideas for your own meal deliveries, some other meal ideas I came up with but didn't use are:
Breakfast: pumpkin bread, banana bread, bagels and cream cheese, waffles, fritata, egg sandwiches
Lunch: chicken salad, tuna salad, chicken Cesar salad, quiche
Dinner: vegetarian taco bar with beans and Spanish rice, salmon pasta alfredo with garlic bread and veggies, pesto pasta, chili and cornbread, lasagne
Snacks: celery with peanut butter, veggies with onion dip, chips and salsa, oatmeal cookies, fruit salad
For more inspiration about delivering meals, you should check out the hospitality archives of the defunct blog Like Merchant Ships. Meredith has delivering beautiful, nutritious, affordable meals down to a science. Start here, here, here, or here.
Linking to Works for Me Wednesday.
Monday, December 10, 2012
Meaningful, Affordable Gift Idea (With Tutorial)
Grab your hand model and put his hand on the disk. Use one hand to hold his hand in place (probably unnecessary if the hand model can be relied on not to wiggle) and your other hand to press the top of each part of his hand, to get an even imprint. Remember to place his hand towards the bottom of the disk so you have room to make a hole. My instinct was to try and center my model's hand, but that doesn't work for the next step.
Use a drinking straw to make a hole at the top of the ornament for hanging. Let dry for several days. Mine took about 3-4 days to dry completely. If desired, you could write the name of the hand model and the date on the back with a permanent marker.
Thursday, September 20, 2012
Making a Hair Cutting Cape
When we first began at-home haircuts, we tried using a towel to drape around the neck and shoulders of the person receiving the haircut, but after washing we learned that this left tiny hairs in all the other clothes and towels and made them very itchy, so we stopped doing that right away. Then, being the classy people we are, we cut a plastic garbage bag open and used that to drape around us when we were getting our hair cut. It kept the hair off our clothes, but was very hot. Nevertheless, we've used he garbage bag method until now.
Over Labor Day weekend, we went to Ikea, where I spied laminated cotton fabric on sale for $1.99 a yard. I bought a yard and let it sit, folded on my coffee table until this very week when I needed something to do that was easy, yet satisfying while I continued to ignore the messes.
To make the hair cutting cape, I cut a line about 5.5 inches long down the center fold of the fabric. Then, keeping the fabric folded, I cut a semi-circle 7.25 inches in diameter at the bottom of the slit. A small bowl would make an excellent template for the semi circle. Unfold and slip the circle around your neck. Boom, you're ready for a haircut.
I've been thinking about sewing some strips of velcro to either side of the slit, so that it attaches more like a professional cape, but I'll probably just leave it as-is. When testing it out, the fabric was heavy enough to stay where it was draped, so the velcro is kind of unnecessary. Plus, I really like that this is a no-sew project. (The laminated cotton doesn't fray, so no hemming is needed.) If we have problems with the cape not staying in place in the future, I could always add velcro then, or just use a binder clip to hold the ends in place behind the neck.
For $1.99 and two minutes work, this was an extremely satisfying project. I feel like I got something done, without having to actually do anything. Maybe I'll tackle the laundry and vacuuming tomorrow.
Thursday, September 13, 2012
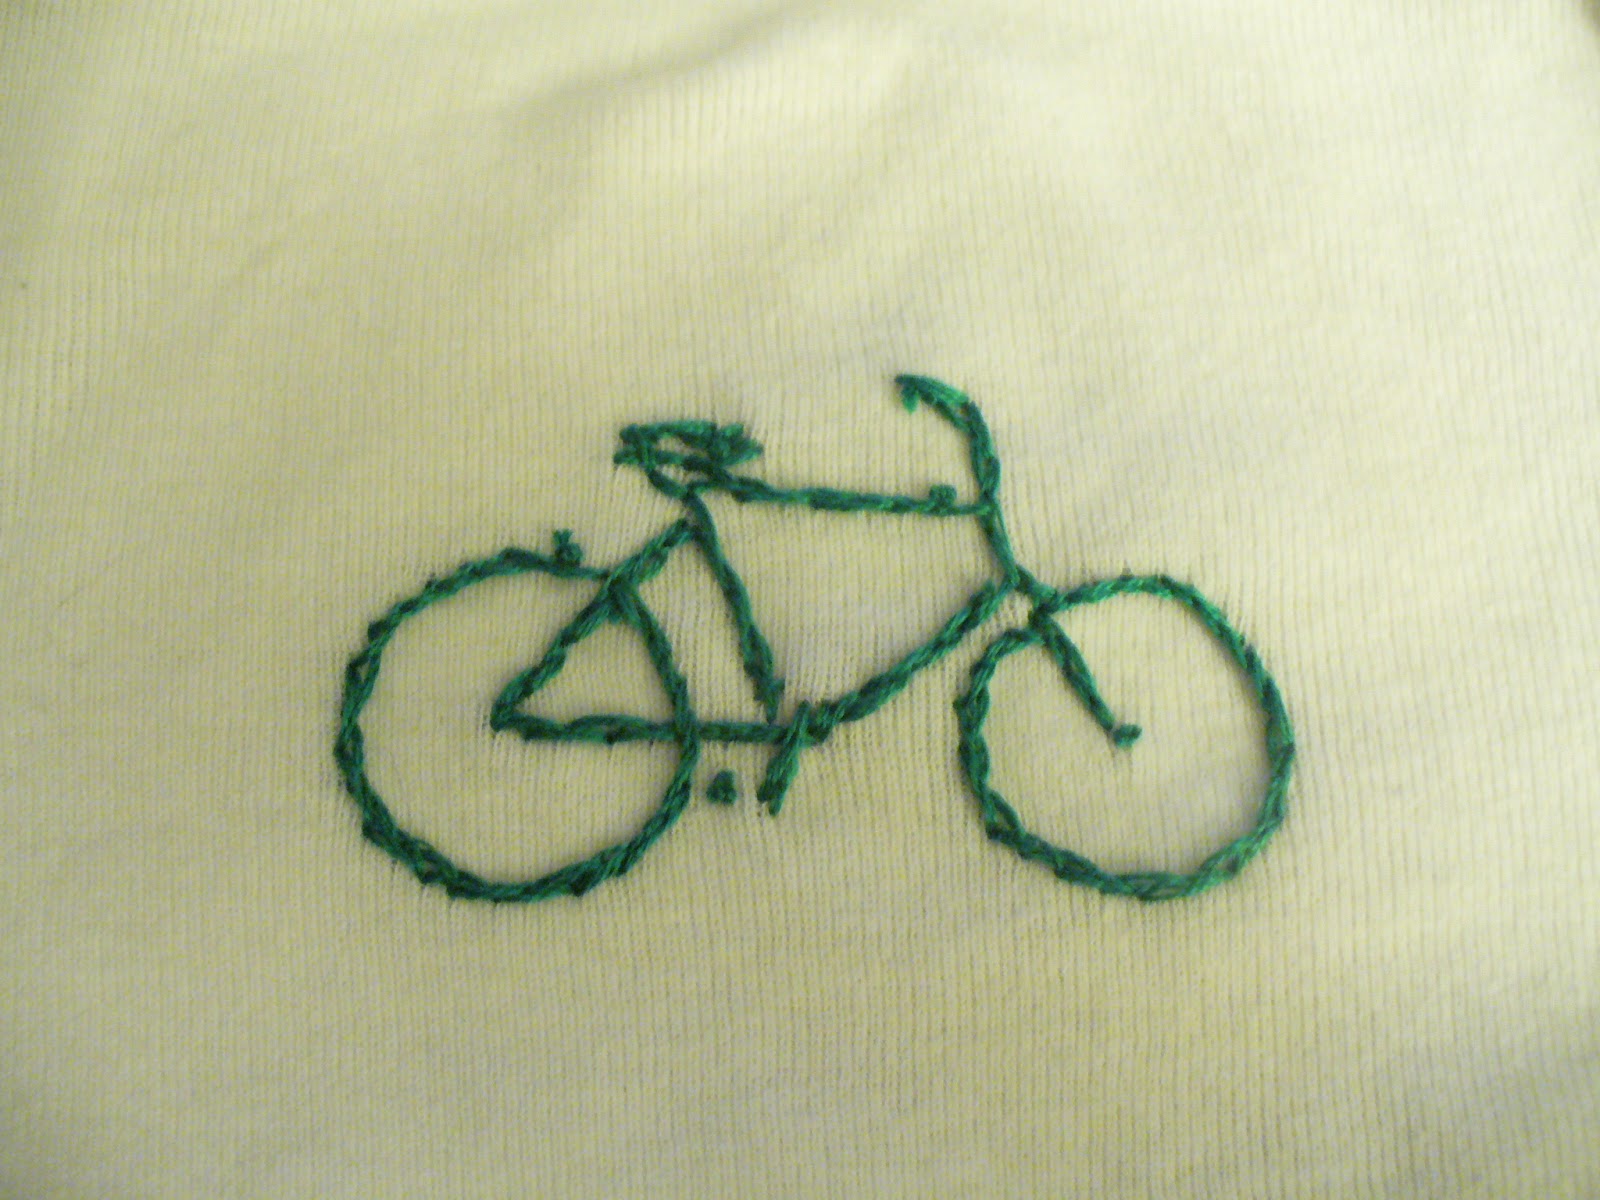
Embroidered Baby Bicycle Onesie
| Front side |
| Back side |
These are such satisfying little projects. They're quick and practical and cost next to nothing.
Linking to Friday Flair and French Country Cottage.
Wednesday, August 15, 2012
Embroidering a Whale Onesie
Since the baby has been born, I haven't been doing very much creatively, and I miss it. I've missed blogging and I've missed making things. So the other night I sat down and embroidered a onesie for the baby. It should have been easy, but my skills are very rusty.
I used this pattern, but simplified it a little bit and inadvertently reversed the image. It was my first time embroidering on a rib knit, and it was hard! I had to use interfacing to keep the fabric from warping and a regular needle rather than an embroidery needle, which meant using fewer strands of embroidery floss, to fit through the tight knit. It's all done in a simple back-stitch (my favorite) with French knots for the eyes.
Hopefully the baby will like it; I'm saving it for his first trip to the Pacific Ocean, next week.
Saturday, April 28, 2012
Moses Basket Alternative
I've had this basket for years; it was given to me as part of a housewarming gift and held bath towels and melamine kitchenware, but I've seen similar baskets at Ikea and discount stores like TJ Maxx. What I like about this basket is that even though it's made of natural materials it's extremely strong, it's shallow, and it has handles.
To prepare the basket for baby, I simply folded up a towel to the dimensions of the basket and then inserted the towel in a pretty embroidered pillowcase. Remember, you don't want babies sleeping in anything too cushy because it can be a suffocation risk. The towel provides enough padding while still being a firm...and it's easily washable.
Because babies outgrow Moses baskets and bassinets so quickly, they can only use it until they learn to roll over, it just makes sense to re-purpose a regular basket for a few months for baby, and then re-integrate the basket back into home storage when you're done with it.
P.S. I totally don't think you need a Moses basket or bassinet, but because my husband really wants to co-sleep with the baby and there's some increased risk of SIDS with that, a basket seemed like a good way to keep the baby in bed with us without compromising safety or splurging on a co-sleeper.
Thursday, April 12, 2012
Gender-Neutral Renters' Nursery
Above, you can see the view from the doorway if you're standing in the hall.
If you follow me on Pinterest, you know that initially, I had wanted to do a nautical themed room. Chuk was concerned that a nautical room would look too grown up for an infant and would read as too boyish with so many blue accents. Since we're waiting to find out the sex of our baby, we needed a gender-neutral nursery. Ultimately, we decided to do a room of bright, happy colors with vintage accents, particularly vintage sports accents.
(From all the cords in the corner, you can tell I don't bother to stage photos. Eh, the room doesn't need to be baby-proofed immediately, right? Don't worry, we'll secure them before the baby becomes mobile.)
The main challenge in decorating this room was that, as renters, we can't paint or change the flooring or other fixed elements. Builder beige walls and taupe carpet doesn't really contribute a lot to the idea of "bright, happy colors", but fortunately baby accessories tend to be bright.
In these photos, the room looks significantly larger and better proportioned than it is in reality. Because the rest of our apartment is small too, we need to keep all the baby toys in this room and it has to function as a playroom as well as a bedroom. (It's also my husband's office. His desk and all our files and office supplies, as well as general household storage, is in the closet.) To accommodate all these functions, we tried to keep the furniture against the walls and added storage to the wall, so there would be space to play in the center of the room.
We couldn't afford to spend a lot so we took advantage of gifts, things we already owned, second-hand finds, DIY projects, and generally just made do.
We still need to finish the crib skirt, hang artwork, and decide whether or not we're going to paint the dresser (there's a long story behind it that makes the decision less than straightforward.) I'd like to find an affordable and colorful rug to disguise the carpet too, but so far, we're really happy with the room. It is such a satisfying feeling when your vision materializes the way you imagine it will.
Monday, April 9, 2012
Sewing A Changing Pad Cover
I simply sewed a hem around the edges of the fabric, then laid the fabric upside down on the changing pad and pinned just the corners, taking up the excess fabric at the corners (like you would when wrapping a present.) Then I sewed a straight line down where I had pinned to form a corner and repeated for all four corners. I turned it right side out and slipped it over the changing pad for a semi-fitted cover. The professional covers have elastic around the bottom (like a fitted sheet) but I find it looks exactly the same if I just tuck the ends under the pad. I was able to make three covers for less than the cost of buying one.
Monday, March 26, 2012
Curtains in the Nursery
They were an awkward length for the window, neither floor length nor cafe length. Though I generally prefer floor length curtains, I think shorter curtains are safer in a baby's room (so they can't be tugged on.) I sewed a big hem on the both panels and then added some ball fringe to the bottom to make them a little more fun. I love the way the ball fringe looks with the Jenny Lind crib we have.
I had the curtain rods and finials from that same Ikea shopping trip eight years ago. Chuk kindly hung them so I wouldn't have to stand on a chair with my big belly.
Other than the cost of four yards of ball fringe, which I think cost around $13 (and I still have some left over) the curtain project was free. It only took an afternoon and turned out better than I imagined it.
P.S. Try not to be too jealous that four out of the five windows in our apartment look out onto an alley with a cinder block wall adorned with peeling paint.
Tuesday, March 20, 2012
Lighting the Nursery
While "prettification" is all well and good, we're still working with a budget which is best described as "the closer to zero the better". I had the lamp pictured above for at least seven years. No joke, I have a thing for acrylic furniture and accessories and it matched my feminine, single girl bedroom back in the day. It does not match our gender-neutral nursery though.
With no overhead lighting in that room and no desire to buy a new lamp when I already had a functional one, a lamp makeover was in order.
Two quick coats of silver spray paint and a new lampshade later, it looks like a new lamp. We already had the lamp and spray paint, so I'm counting those costs as $0. The lampshade was $7.99. Less than $10 for a "new" lamp, nice.
Linking to 320 Sycamore.
Thursday, February 23, 2012
Mending Sheets
At first I tried just sewing (using a whip stitch? I'm not great with stitch names) the two sides of the tear together, but the fabric was too worn, so I cut out my stitches and used some iron on hem tape to reinforce the back of the tears with another little scrap of fabric. Then I re-sewed the two of the holes with the "whip stitch".
I didn't really love how it turned out because the fabric was a little puckered and it looked like the stitches could pull out.
With the final tear, I reinforced the back of the sheet with scrap fabric and the hem tape, but then used a satin stitch to cover the tear. I was much happier with how this turned out. It didn't create any wrinkles in the fabric and it seems like a much stronger repair.
Saturday, February 11, 2012
Quick and Easy Valentine's Garland
I made a little template by free-handing a heart on a piece of scrap paper and then folded up four pieces of printer paper so I could cut out a bunch of hearts at once. I was going to do all white, but then I decided I wanted a little color in my garland too, so I cut more hearts out of a single piece of red construction paper.
I stacked up all the hearts and took them to my sewing machine, which was already loaded up with white thread from this project. I just fed the hearts into the machine one at a time, trying (not always sucessfully) not to overlap them so the garland would still have some movement. Sewing all of them took about five minutes, and that was with me going slowly. Then I taped the garland to the ceiling between my kitchen and dining area.
I like this project because I had all the materials on hand so it was free, the mistakes I made are not noticable, and it makes a big statement for very little effort.
Are you doing any seasonal decorating? Have you ever sewn paper?
Thursday, January 26, 2012
Making Burp Cloths
Several months ago Chuk and I picked up a pack of prefold diapers at TJ Maxx (or one of those discount stores) for less than $1 per diaper, which is cheaper than I've seen used prefolds selling for online. I washed them up and, since the baby will be using it for burping, embroidered "Excuse Me" on them. I just free-handed the embroidery, which I've never done before and I don't love the result, but for something whose sole purpose is to be barfed on, I can live with it. Then I sewed on some fabric I already had that I had been saving for pillows. It didn't take very much fabric, so I should still be able to make the pillows.
It's a quick and satisfying project that will hopefully be useful in a few months. Now I'm off to make a few more.
Monday, December 12, 2011
The Stockings were Hung by the "Chimney" with Care
I spent Friday afternoon decorating our Christmas tree. It's three feet tall. I had bought it a week and a half earlier at Costco, just like the Christmases of yore. Ha!
Growing up, we would always cut down our own tree. Since I moved to the big city, I've mostly bought my Christmas trees from farmers' markets. This year, my husband is up to his neck with board week at work and finals at school and I'm up to my neck in pregnancy. I decided to respect our limits, so a tiny Costco tree it was.
Decorating it was a snap. It only took one strand of lights and I used our smallest ornaments to keep things in scale. The star we normally put on top of our tree was much too large, so I stuck an angel my late grandma had crocheted on top. It was meant to be a toilet paper cover, so it keeps flopping forward, but I love it anyway. I might even use it as a tree topper next year.
I spent some time Saturday wrapping all our presents. I hate theme wrapping paper, but Chuk brought this Christmas paper into our relationship years ago. Normally, I won't use it at all, but we were close to the end of it so this year, I was determined to use it up. I used it to wrap all of our presents, and wouldn't you know it, we still have some left! It's the loaves and fishes of wrapping paper.
I've finished my shopping, but Chuk has some more to do for his family. We're not exchanging gifts with them until January, so there isn't a lot of time pressure. We're spending Christmas in Texas and Louisiana with my extended family, so I expect he'll wait until the new year to finish his shopping. Hopefully, he'll get them large things so we can use up that darn Christmas paper.
As apartment renters, we don't have a fireplace, but last year I bought these JOY stocking holders after Christmas for 50% off, so our stockings are hanging from our bookshelf rather than a mantel. I wish I could hang the stockings from the bottom shelf, but the doors on the bottom half of the bookcase prevent that, so I'm just going to have to deal with them blocking the photos on the lower shelf.
The stocking on the right was made by my grandma, the same one who made the tree topper. I've had it since I was a little girl and I love it. It will always be my real stocking, but for display purposes, we're counting it as the cat's stocking. (We don't get our cat a present or anything for her stocking. So far, she hasn't noticed.) My mom got us the stockings on the left last year. I like them, but I still make Chuk fill the stocking from my grandma. It wouldn't be Christmas otherwise.
This year our decorations are very low key, but fitting for this season in our lives. I'm so glad we are able to have some festive decorations, but that it wasn't stressful at all and other than the $20 I spent on the tree, didn't cost us anything. Despite how busy our schedules are now, everything is so peaceful this year, it's hard to imagine that next year we'll have an eight month old celebrating its first Christmas with us. We can barely wrap our brains around it.
Linking to The Inspired Room's home tour.
Sunday, November 20, 2011
Autumnal Decorations
I picked up a few colorful leaves from the ground and brought them home determined to do something with them. What I struck upon was decorating some candles and candle holders with the leaves. It only took a few minutes to put together and I already had all the things I needed, so it was really simple and convenient little project.
I simply chose leaves that were the height of the votive holder or candle I was working with and used some tiny pieces of double stick tape to hold a leaf on each side while I used some kitchen string to tie the leaves onto the candle or holder. I knotted the string and cut off the excess "tails".
You could probably get away with not using the tape, but it helped since I didn't have an extra set of hands helping to hold everything in place. I think it probably would be cuter to use twine or bakers' string to hold the leaves on, but all I had was the cotton string I use to truss poultry, so that's what I went with. Finally, I didn't bother to press my leaves before I started working with them, and as they have dried out over the last week or so they've curled a little at the edges, which is evident in the pictures, but that doesn't really bother me. If it bothers you, I suggest you just press the leaves.
This is pretty much the extent of my fall decorating, but I'm happy because it didn't cost me anything and I have pretty leaves to look at.